Instructions:
- Log in to your WordPress Dashboard.
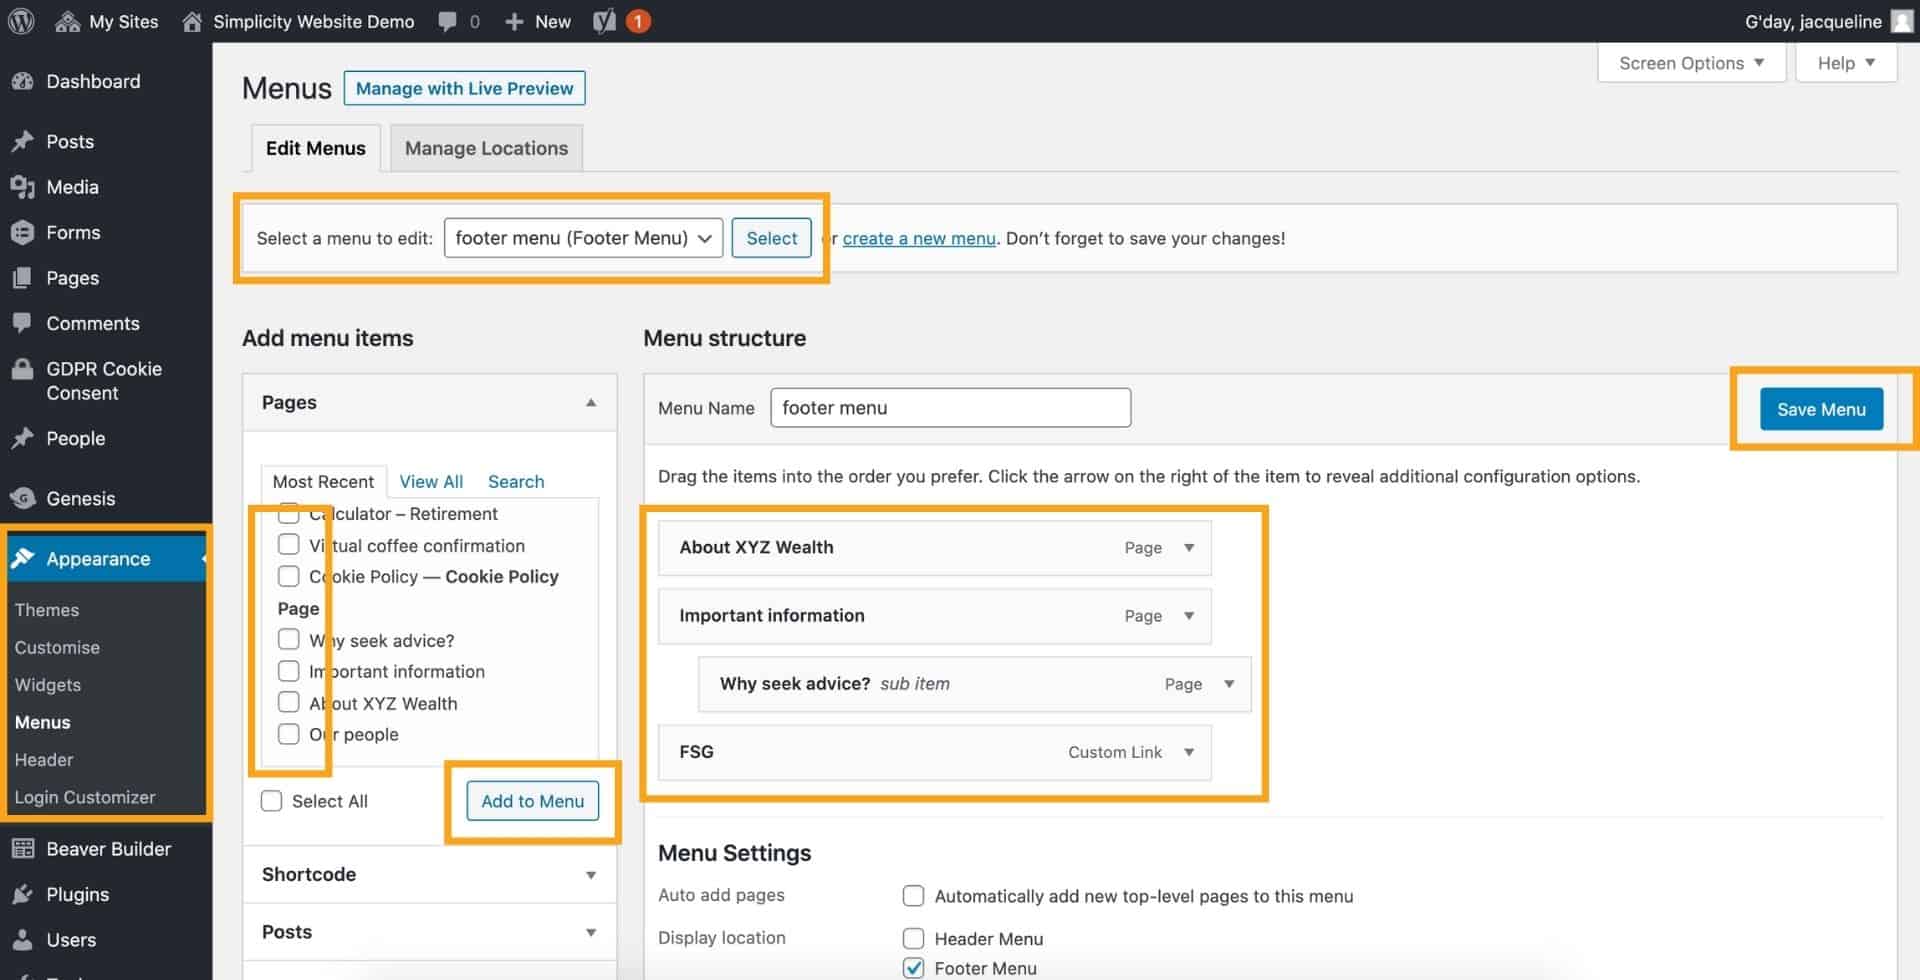
- On the left-hand side menu, go to Appearances > Menus
- Under the Pages widget, you will see the pages you have created.
- To add a page to your menu, under Pages, select the checkbox next to the title of your page and then click Add to Menu.
- To add a link to your menu, under Custom Links, enter the URL and Link Text (e.g., “Client portal”). Select Add to Menu. Where this item has been added to your menu, select the downwards facing arrow. Tick the checkbox that says Open Link in a New Tab.
- To remove a page from your menu, within Menu Structure, click on the arrow next to the specific page you would like to remove, then select Remove.
- To rearrange your menu order, use the Menu Structure feature by dragging and dropping each menu item. Notably, each main page sits on the left, while subpages are indented.
- Select Save Menu.
- To change a different menu (i.e. your footer instead of your main navigation), select the drop-down menu next to Select a Menu to Edit. Once you have selected the different menu, click Select next to the drop-down menu. When you’re done, select Save Menu.
Video:
Click here to watch a short video on this process.