Instructions
These instructions apply to client sites built prior to 2023.
- If you do not have a blog already on your site, contact us. Otherwise, continue to the next step.
- Log in to your WordPress Dashboard.
- On the left-hand side menu, go to Posts > Select a Post or Add New.
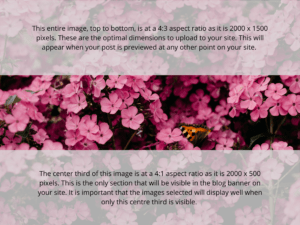
- Scroll down a little and select Set featured image on the right-hand side to upload your image. Please try to meet the following criteria before uploading an image
- Make sure that the file you choose has the right dimensions consistent with the rest of your site (typically either 1400 x 935 pixels or 2000 x 1500 pixels).
- We also recommend you use images that have a file size of about 100kb because anything much larger will slow down your website.
- Protip: if you are having trouble trying to find an image that works, try finding a simple alternative that represents your point well enough or something neutral (e.g. flowers seen below).
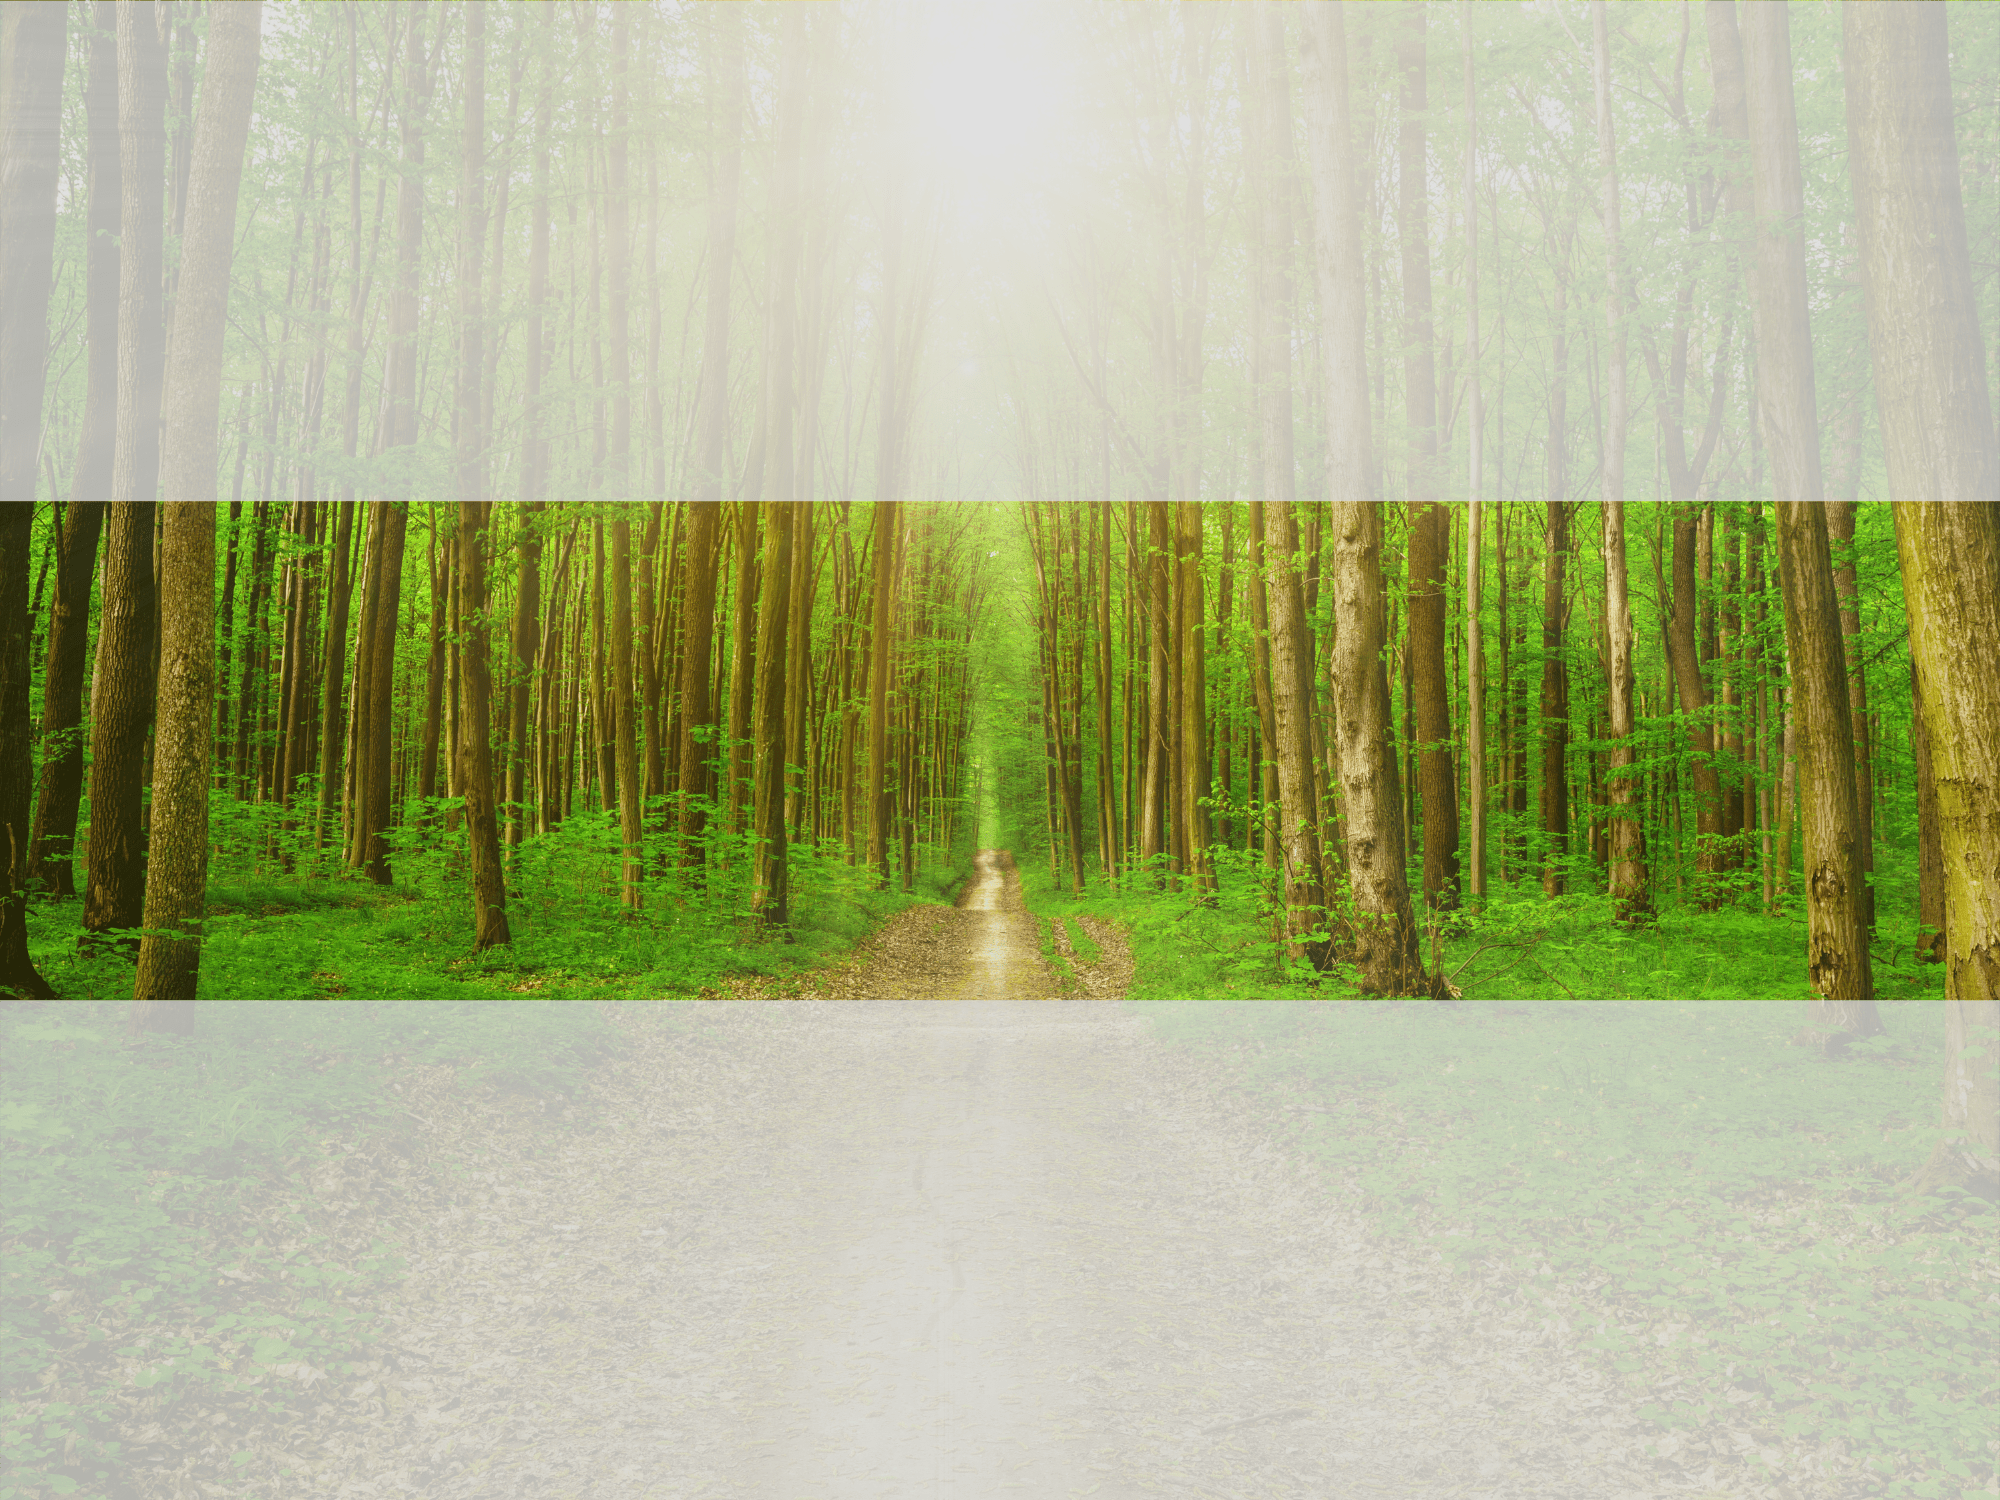
- The featured image will show in full size on the blog page, but only the middle third will show as a banner once the user selects the post. This is indicated in the floral image below. Therefore, it’s important to choose images that work as both a whole and divided. The other two images below demonstrate an effective (the primary purpose of the image remains) and ineffective (most family member’s faces are only partially visible) feature image respectively.
- When you are done, click Publish at the top of the page. This will now display on the blog page of your website.

Don’t want to manage updates yourself?
Purchase a support ticket package to save your team time.